Channels#
What is a channel?#
A channel is a location (a URL) where conda will look for packages.
The Anaconda-curated repository provides the following channels for use, categorized by package type:
main
msys2
r
Channel types#
- Anaconda channels
The Anaconda channels connect to the repository that is curated and maintained by Anaconda. These channels provide you with thousands of the most popular data science platform packages available today. It is possible to apply a policy filter to the Anaconda channels. That policy filter will not affect Organization channels that are created from the same source Anaconda channel.
- Virtual channels
Your organization’s channels are virtual copies of the Anaconda channels. You can apply a policy filter to a channel to restrict the packages that are available through that channel, which customizes its contents, making it unique. For example, you can have two channels that both pull from the Anaconda
mainchannel, but the available packages they provide can be different due to the policy filter that have been applied to the channels.- External channels
External channels will point to a location (a URL) that is outside of Anaconda to look for packages.
- Hosted channels
Anaconda hosts several additional channels that are available for your organization to subscribe to. Speak to your dedicated customer success manager for assistance with subscribing to hosted channels.
Anaconda-Extended Release - The Anaconda-Extended Release channel compiles the most widely used Linux-64 conda-forge packages according to Anaconda’s rigorous standards, providing you with a repository of packages that work together seamlessly. Access to this channel gives you packages, CVEs, secure signatures, and provenance documents based on Anaconda’s curation process.
Note
You cannot apply policy filters to external channels. Currently, Anaconda only supports connection to external channels located at https://conda.anaconda.org/, but we plan to support any URL soon.
Channel access#
There are two levels of permissions associated with channels in Anaconda: internal and private.
- Internal channels
Internal channels are visible to all members of your organization who have been assigned a seat.
- Private channels
Private channels have their contents restricted to those members who are part of the group the channel is assigned to. For more information about assigning channels to a group, see Groups.
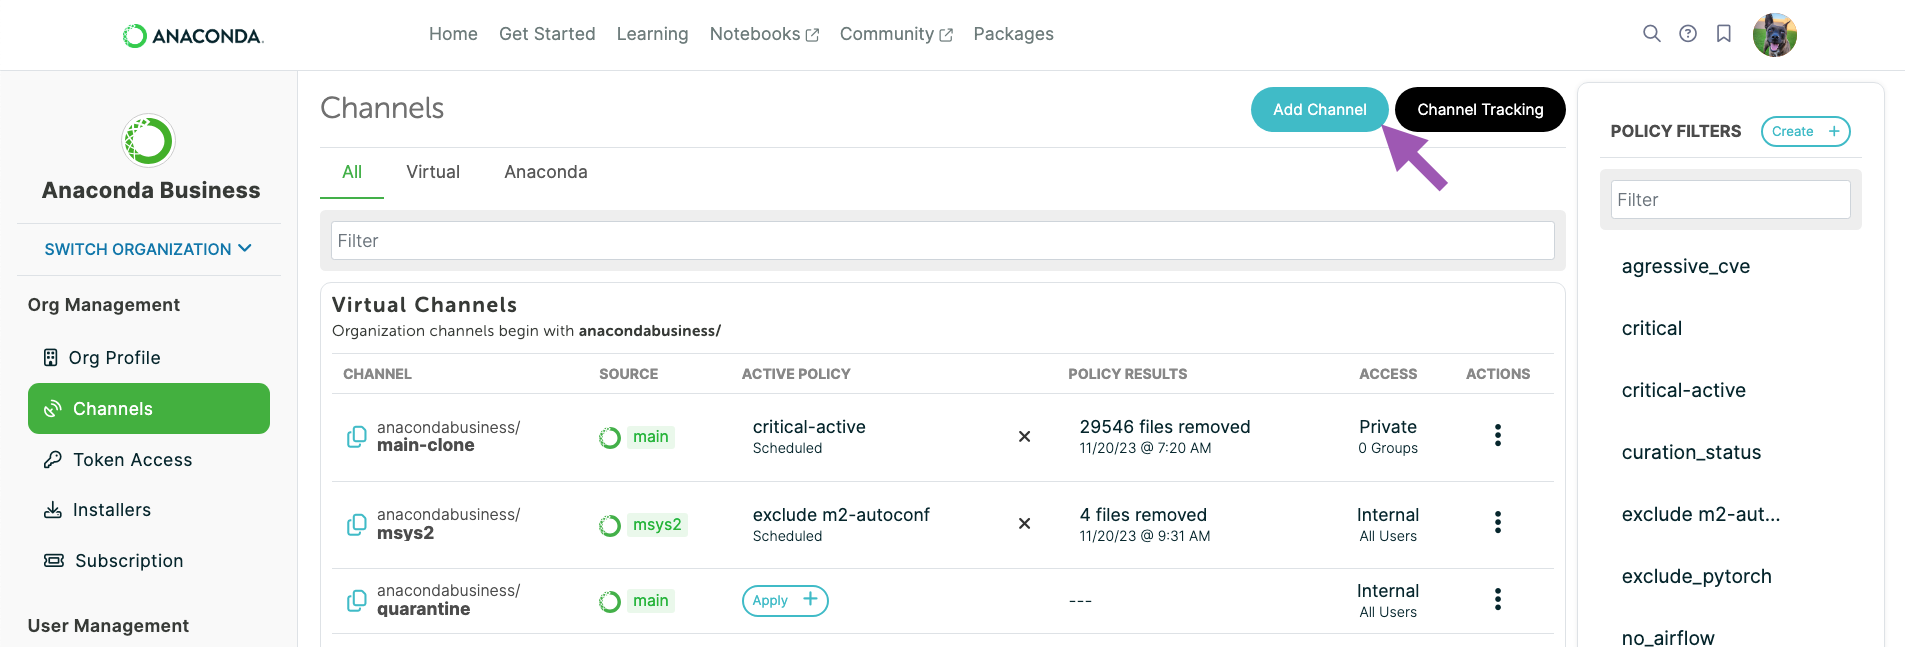
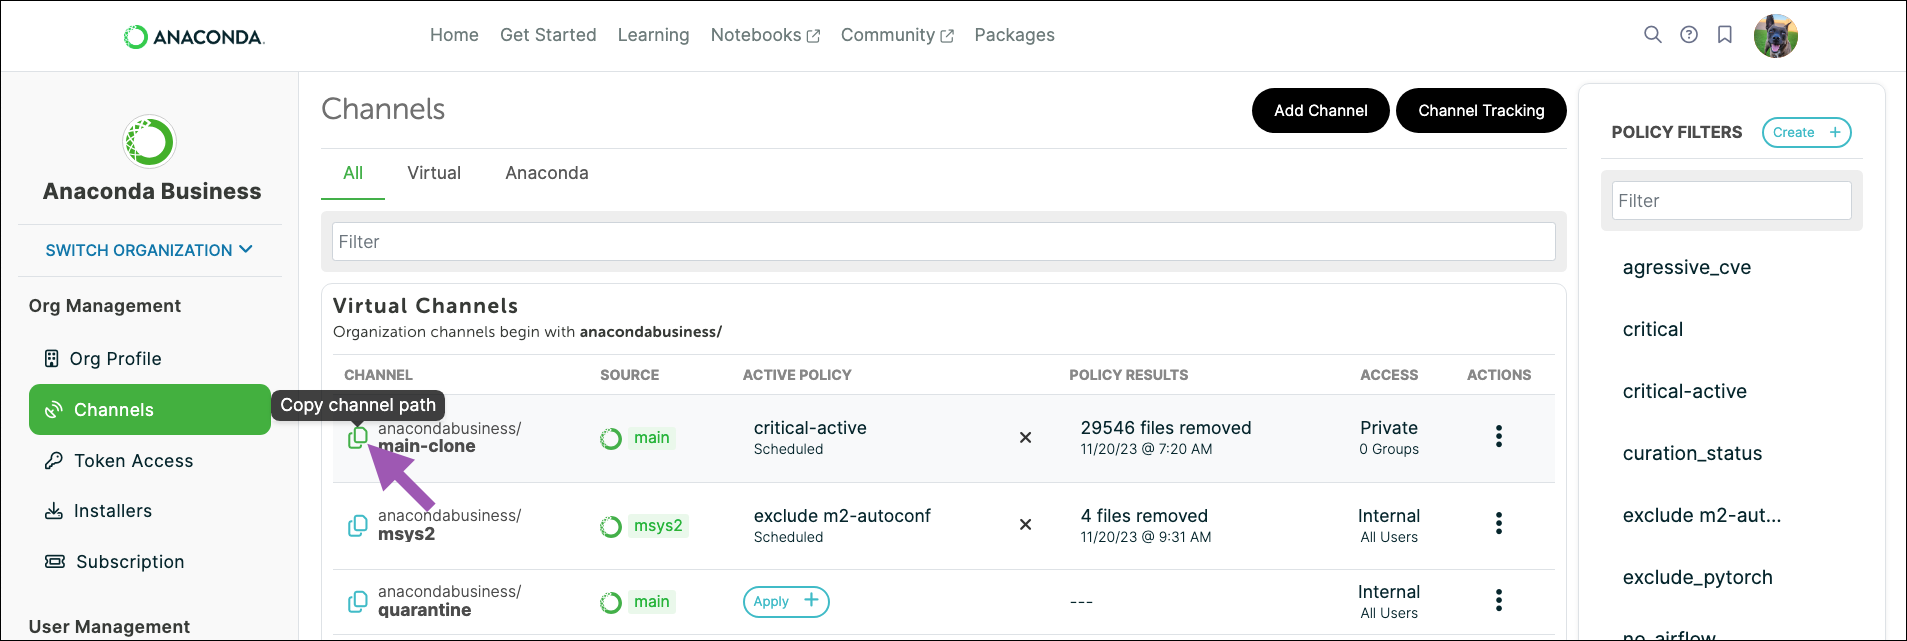
Creating an organization channel#
From the Channels page, click Add channel to open the Create Channel dialog.
Enter a unique channel name.
Select a channel type.
Select a source channel from the Source dropdown or enter the address for your external source channel.
Set the access level for the channel.
Click Save.
Your new channel will appear on the Channels page.
Note
If you set the channel access level as private, you will also be prompted to add the channel to a group. If you do not wish to add the newly-created private channel to a group, click Cancel in the Assign Groups to Channel dialog.
Assigning channel access#
You can change the access level of a channel at any time from the Channels page.
From the Channels page, click the actions icon for your channel.
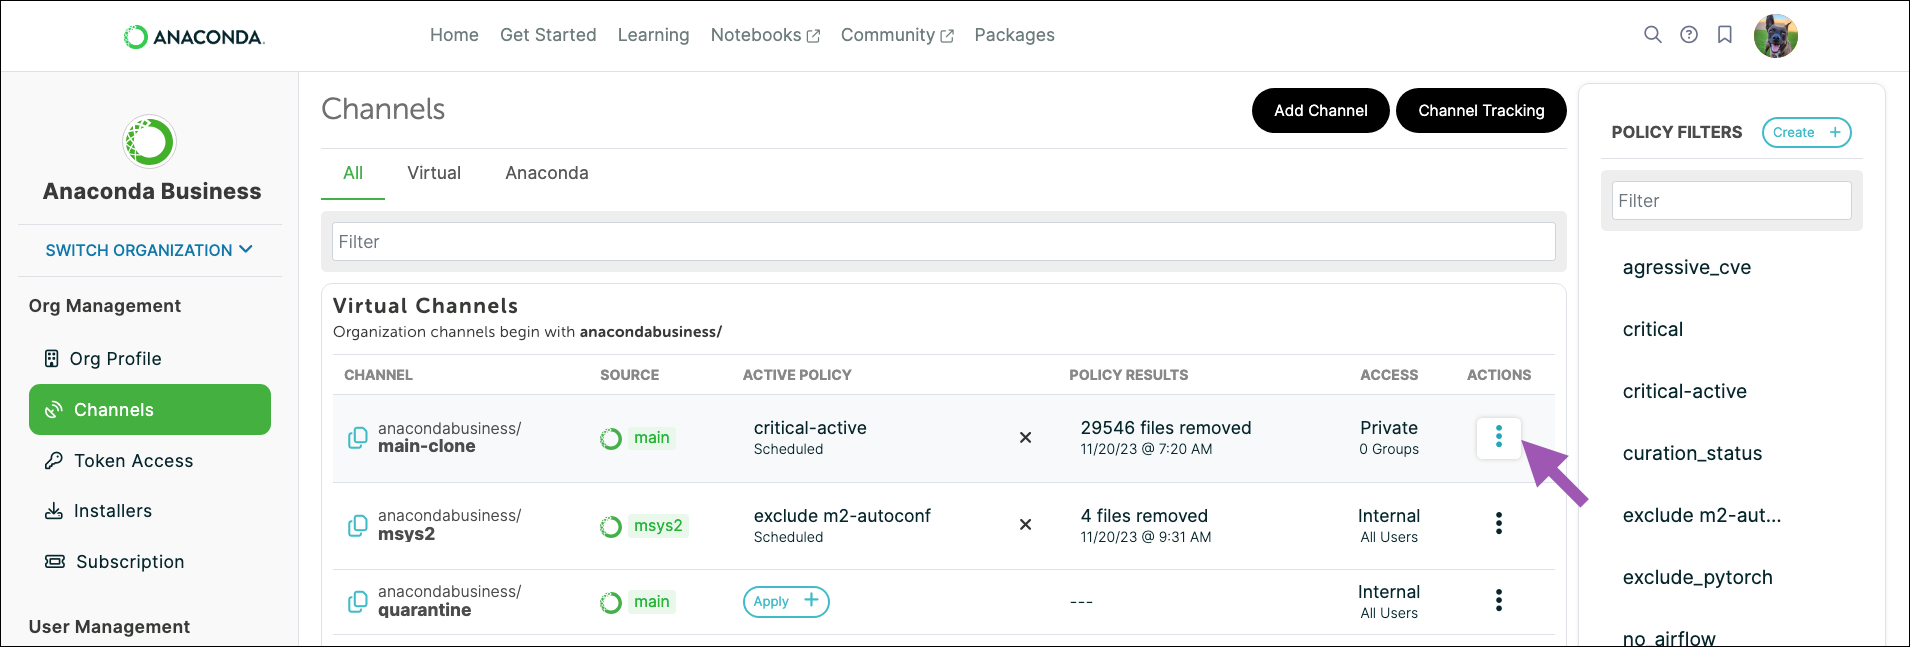
Select either Make Channel Internal or Make Channel Private. Your available option depends on the current access level of the channel.
Note
Private channels that are not assigned to a group are only visible to organization administrators.
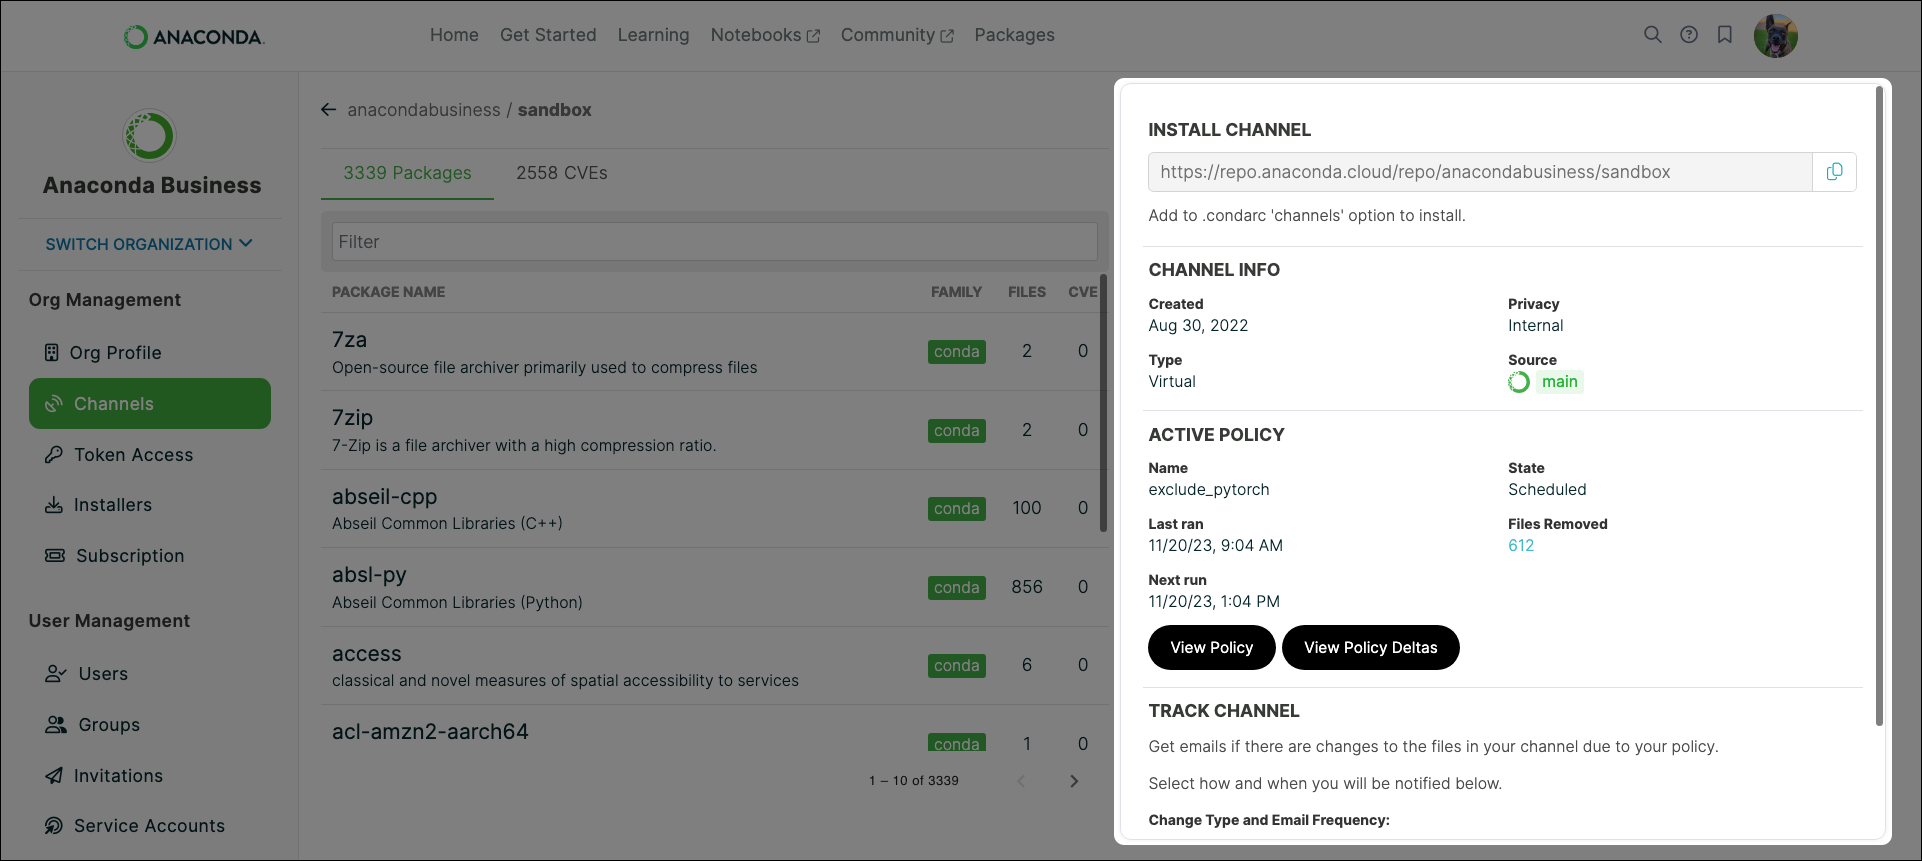
Viewing channel details#
From the Channels page, select any channel to view its details.
The channel details page provides the following information about the channel:
The channel’s address (a URL you can copy and add to your
.condarcfile to access the channel’s packages)General information about the channel
Information about the policy that is applied to the channel
Tip
You can also track your channel from the channel details page.
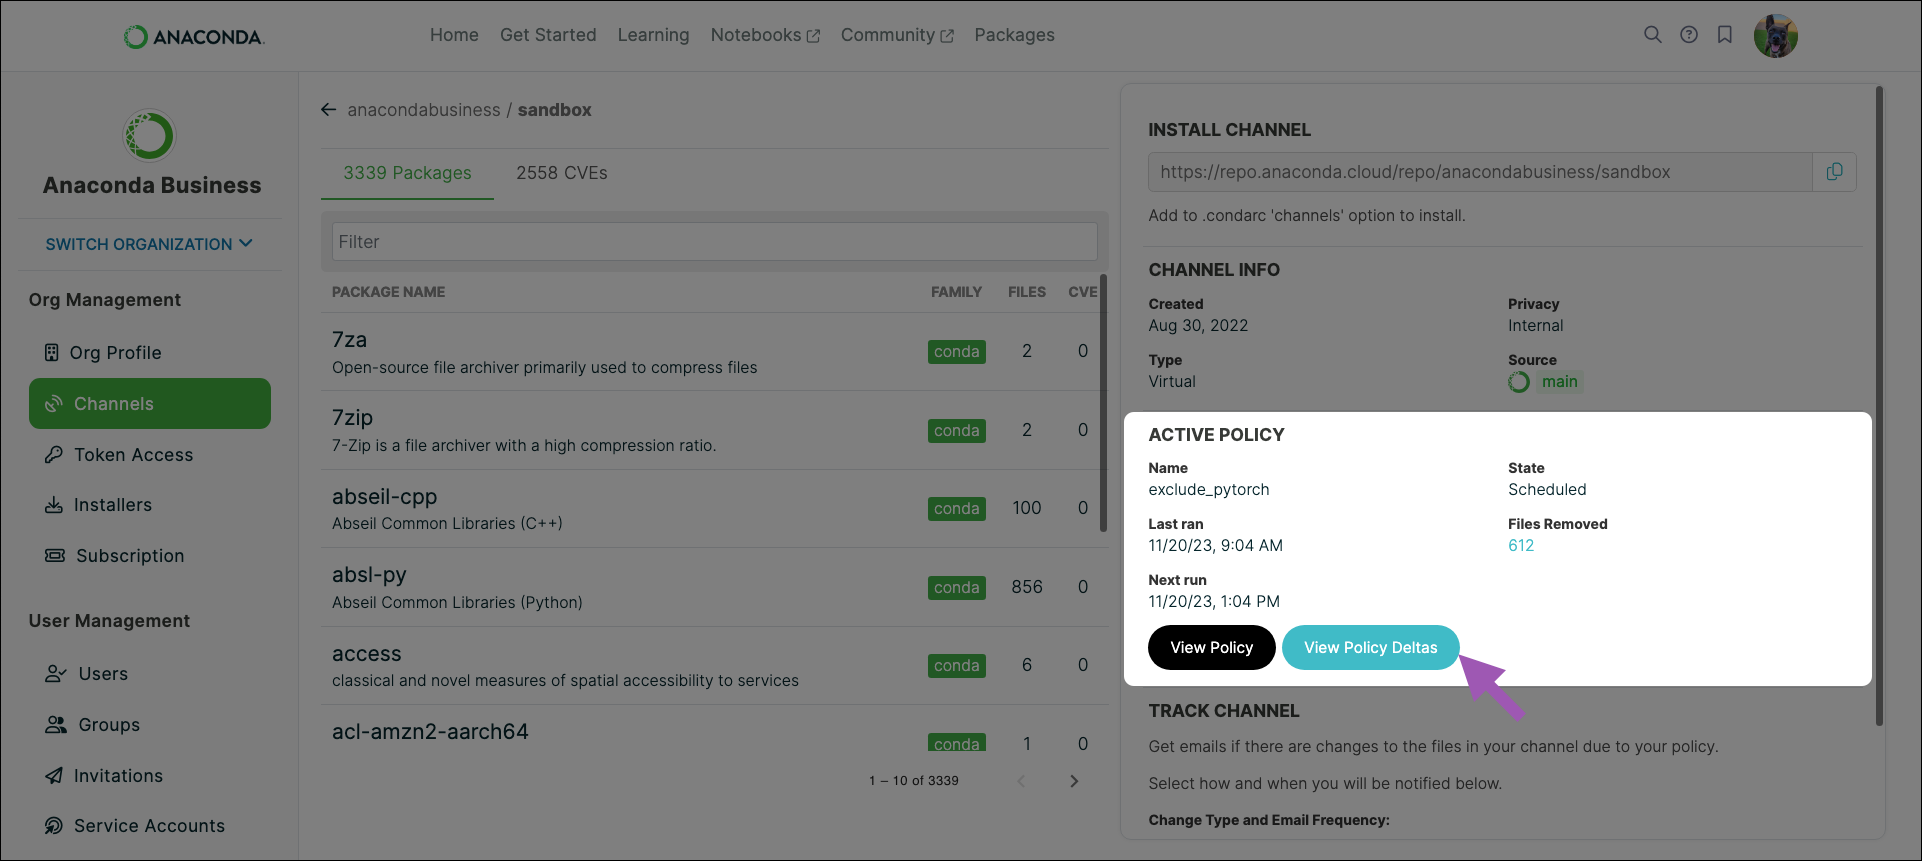
Channel policy deltas#
Policy filters, once applied to a channel, run every four hours. Sometimes, due to newly reported CVEs or an updated CVE score or status, the contents of your channel will change when the filter performs its scheduled run. A package may become available that was not available previously, or you could find that a package you’ve been using is removed from your channel!
From the channel details page, click View Policy Deltas to view a list of deltas. Deltas are the recorded changes to your channel’s contents. Policy delta history begins from when you first applied the policy to the channel. Once the policy is removed from the channel (if you need to edit it, for example) the policy delta history is lost. A new policy delta history is established once the policy is reapplied to the channel.
Use the Start and End date filters to narrow your timeline to locate a specific delta if necessary. Select either Packages Added or Packages Removed to see a list of packages from a specific run.
Tip
Click the arrow to return to your channel policy deltas.
Channel tracking#
Track your channels to receive emails at configurable intervals to keep up-to-date with the latest changes to your channels’ contents.
From the Channels page, click Channel Tracking to view the Track Channels page.
Note
You can also track a channel from the channel details page.
Select your channel from the list, choose which types of emails you would like to receive, and then set the frequency at which you would like to receive them. You can receive emails in realtime, daily, or weekly. Click Save to retain your changes.
Tip
Because deltas are generated when the policy filter runs, the realtime option can generate a maximum of one email every four hours.
Adding an organization channel to your .condarc file#
In order to pull packages from any of your organizations’ virtual channels, you must first configure your .condarc file to tell conda where the channel is located. Complete the following steps to add one of your organizations’ channels to your .condarc file.
Navigate to your Organizations page.
Select your organization.
From the left-hand navigation, select Channels.
Select the copy channel path icon.
Open your terminal and run the following conda config command:
# Replace <CHANNEL_PATH> with the copied channel path
conda config --prepend channels <CHANNEL_PATH>
This will configure conda to check the specified channel for packages first, but will still look in the
default_channelsifdefaultsis present in the channel list. If you want to restrict where you pull packages from to one specific channel in your organization—for example, one with a policy filter applied to it—update your.condarcfile to only include that channel in the channels list.Your
.condarcfile might look something like this:channels: - https://repo.anaconda.cloud/repo/<ORG_ID>/<CHANNEL_NAME> - defaults add_anaconda_token: true restore_free_channel: false default_channels: - https://repo.anaconda.cloud/repo/main - https://repo.anaconda.cloud/repo/r - https://repo.anaconda.cloud/repo/msys2
Note
You can add the default channels to your .condarc file’s channels: list at any time by running the command: conda config --append channels defaults
Removing a channel from your .condarc file#
To remove a channel from your channels: list, open a terminal and run the following command:
# Replace <CHANNEL> with the URL listed in the
# channels: section of the .condarc file
conda config --remove channels <CHANNEL>
For example, if you don’t want to pull packages from the default channels, you can run the following command:
conda config --remove channels defaults
Note
This will leave the channels listed under default_channels: in the .condarc file for later use if needed, but won’t look for packages in those locations.